![]()
One of the biggest marketing trends of 2015 has been email automation. In fact, The B2B Marketing Automation Study, concluded that “There are nearly 11 times more B2B organizations using marketing automation now than in 2011”. Marketing automation has a number of benefits including improved list segmentation, lead nurturing, detailed analytics/reports, and ultimately more sales.
However, many companies are encountering some challenges before making the leap to automation. These include the price of automation software and the difficulty of setting up a campaign. MailChimp addresses both of these concerns with a cost-effective and simple solution. Here’s how:
Before You Begin
1. Familiarize Yourself with the Workflow Types
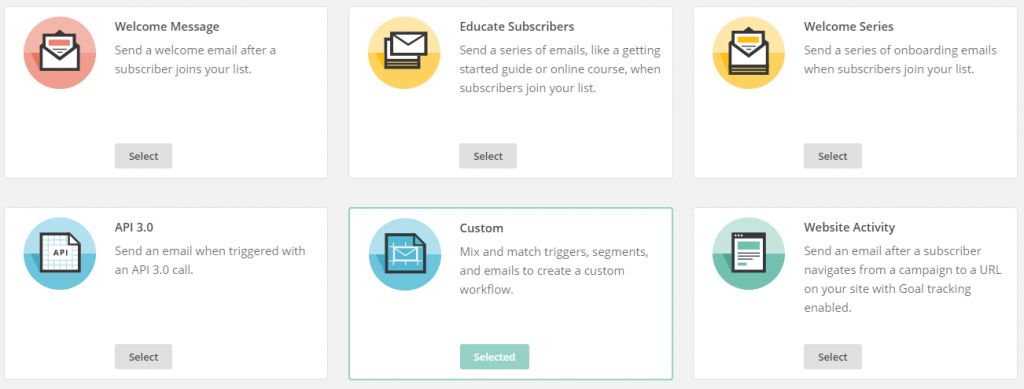
MailChimp offers six preset workflow types. These have preset triggers to push your emails out. You also have the option of creating a customized workflow. Remember, once you begin your automation, you cannot go back and change the workflow type, since it will disrupt the event triggers you had originally set up. Determine the goal of your campaign and choose a workflow type accordingly.
2. Create your list
Input the contact’s information including email address and names. Create a list specific for your automation campaign. Here’s a how to video on how to create MailChimp lists.
Step-by-step guide on how to create a workflow
1. Once you log into MailChimp, on the top navigation panel click “Automation”.

2. On the automation page, click on the “Create Automation Workflow” button on the top right corner.
![]()
3. The next step will prompt you to select a list from a drop down menu for your campaign. Remember, you have set this list up ahead of time.
4. After selecting your list, you’ll get the opportunity to choose your workflow type. Here are your choices:
5. In the set-up stage you will input information into fields like “Workflow Name”, “From” and “From Email”. This is also where you will set up tracking information for Google Analytics and SalesForce.
6. Next, you will have to confirm your Trigger. This is determined by what Workflow type you initially selected.
7. Once this is complete, you can begin adding emails in your work flow. When you click “Add Email”, you will get your first Automation Email #1 (image below). The two main functions here are “Design Email”, which will take you through the process of setting up that email, and the “Change delay” option, which allows you to customized when you want each email to be sent. Continue to add emails until you feel your workflow is complete.

8. The final step is to confirm all your information. MailChimp will provide you with a list of things that are completed and ones that still need to be addressed before starting the workflow.
Now, you’re all set to begin an Automation Workflow campaign within MailChimp. Don’t forget to check into MailChimp’s reports after beginning your campaign to see the results. In addition, remember to carry out other marketing activities to help support your automation.
For more on marketing insights sign up for our monthly newsletter.
